

I was 10 years old. It was late, way past my bedtime. Mum, Dad and I were glued to the TV, no one was talking, the tension in the room was unbearable. I couldn’t take it any longer, I knew what was about to happen and burst into tears and then, BANG, it was all over.
A single shot cracked out of the barrel of a shot gun, fired from the stern of the committee boat, signified victory to Stars & Stripes. The 1987 Louis Vuitton Cup final was all over and my boat, Team New Zealand’s Kiwi Magic, had just been crushed four races to one by American Dennis Conner aboard Stars & Stripes. The New Zealand boat would not go on to win the 1987 America’s Cup in Fremantle Australia, Kiwi Magic would not go down in history as the greatest 12 metre class yacht ever built, and I was pretty sure the sun would not rise in the morning.
Fast forward 27 years to a rainy Vancouver evening, I was messing around on Ebay, looking at some old boats when I stumbled across an old half model of Kiwi Magic for sale. I couldn’t believe it, I hadn’t thought about that boat in years and all those childhood memories came flooding back, the plucky, amateur Kiwi underdog taking on the might of the United State’s Dennis Conner and his seasoned team of professional sailors—the ultimate David and Goliath match up.
I had to have that half model. I could imagine it hanging on my office wall and how I would proudly educate my fellow colleagues on the history of the boat and how even in defeat she brought fame and pride to my native country of New Zealand. And then I looked at the price, $650, for a half model! I’d expect to get the other half as well for that kind of money… And then a light bulb flicked on in my mind, could I build my own half model? My track record of model building was sound, having successfully built a plastic kit set model of a Spitfire when I was 16. In the best traditions of being a bloke, I announced, “I’m going to give it a go!”
Getting Started The first thing I needed was some plans. I decided not to mess around and fired off a quick email to the boat’s designer Bruce Farr.
“Dear Bruce, I would like to build a model of Kiwi Magic, can I have a set of plans please?”
To my astonishment, the next day I received a reply saying Farr Yacht Design would be happy to supply me a copy of the plans, for the nominal cost of $100!
With the plans sorted, my next decision was the construction method. After doing quite a bit of research, it quickly became clear that the traditional way to build a half model is to carve it from solid or laminated block of wood using the “lift method.” But this method requires wood working tools and skills far beyond my level of competence. I did however find quite a bit of information on building model planes from balsa wood and figured I could apply the same techniques to build my model. I’m sure there are easier and faster ways of tackling a project like this, but this is how I did it.
The Build
1. The deck was cut from a sheet of 3/32-inch balsa and the 12 bulkheads cut from 3/16-inch balsa. To achieve the classic bow in the deck, I inserted a small off cut under the upturned deck and put weights on ether end then attached the bulkheads using white glue.
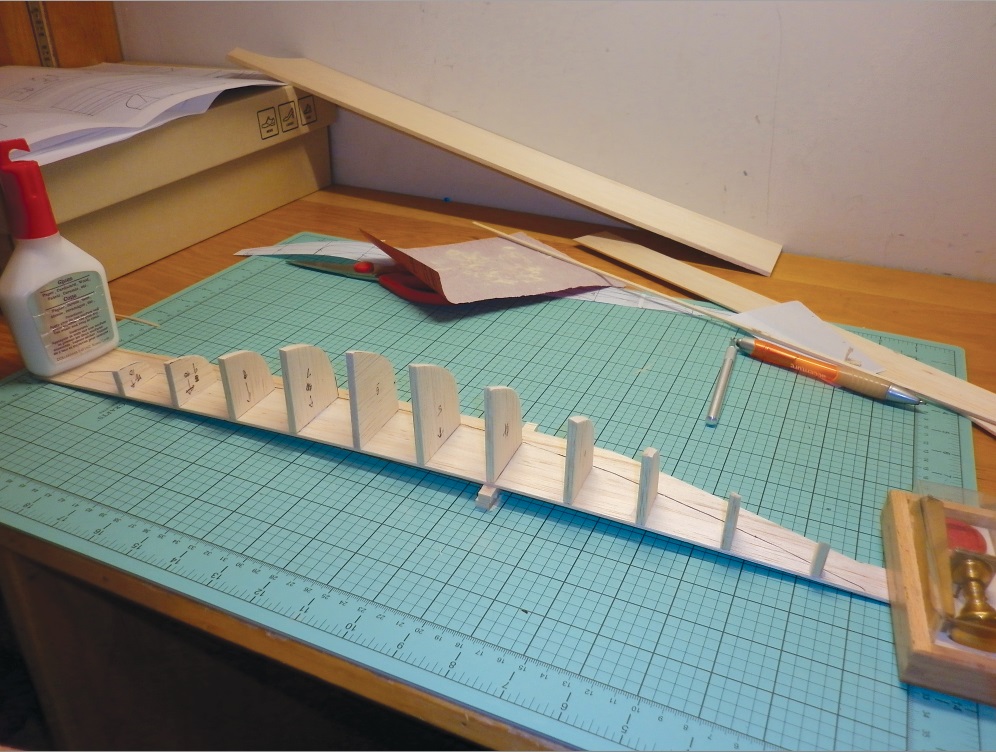
2. With the bulkheads in place, I started on the strip planking. I cut the planks from 3/32-inch balsa, securing them in place with sowing pins while the glue dried. The excess glue needs to be wiped away before it dries. Once a few planks were secured, I was able to remove the weights on ether end of the deck and the planks held the deck bow securely in place.
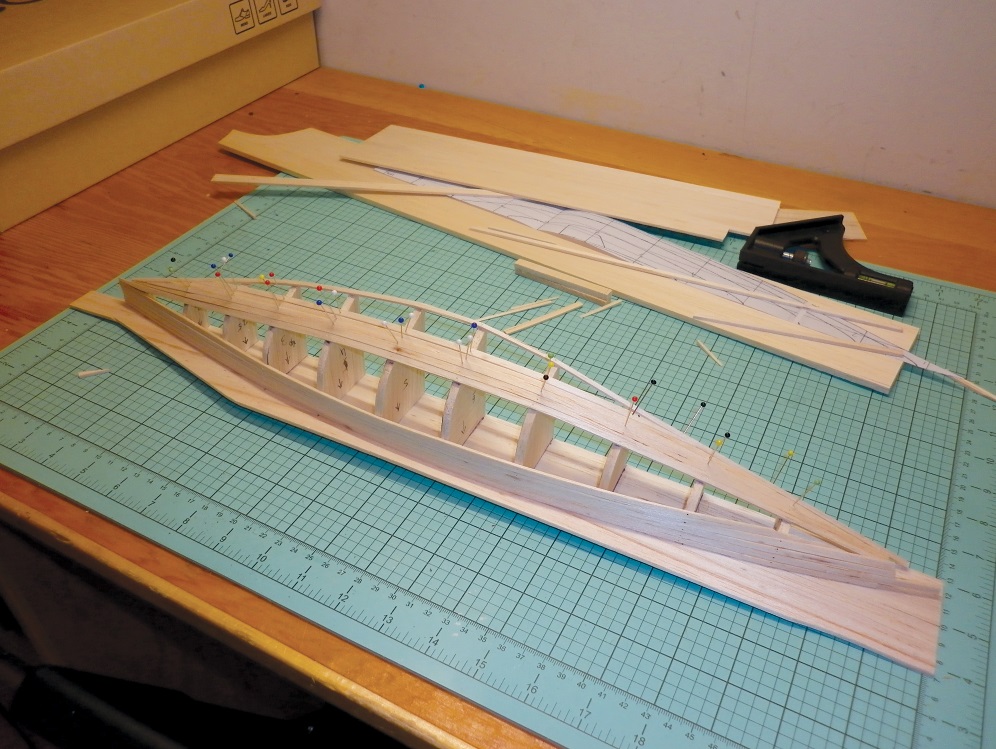
3. With all the planks in place, I trimmed the deck around the gunnel and shaped the bow and stern, then gave the hull a good sanding with 180-grit sand paper. At this stage there were still many imperfections, so I covered the hull with a thick layer of filler. Once dry I sanded the hull again with a sanding block. At this stage the keel had been cut from a block of balsa, but it was yet to be shaped and have the wings added.
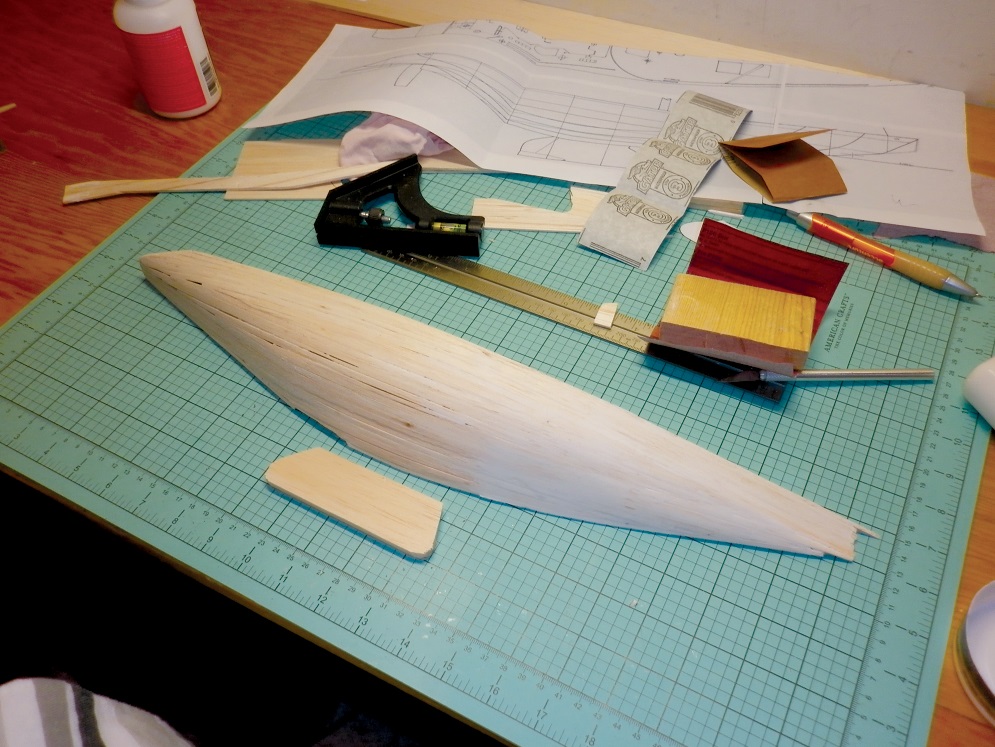
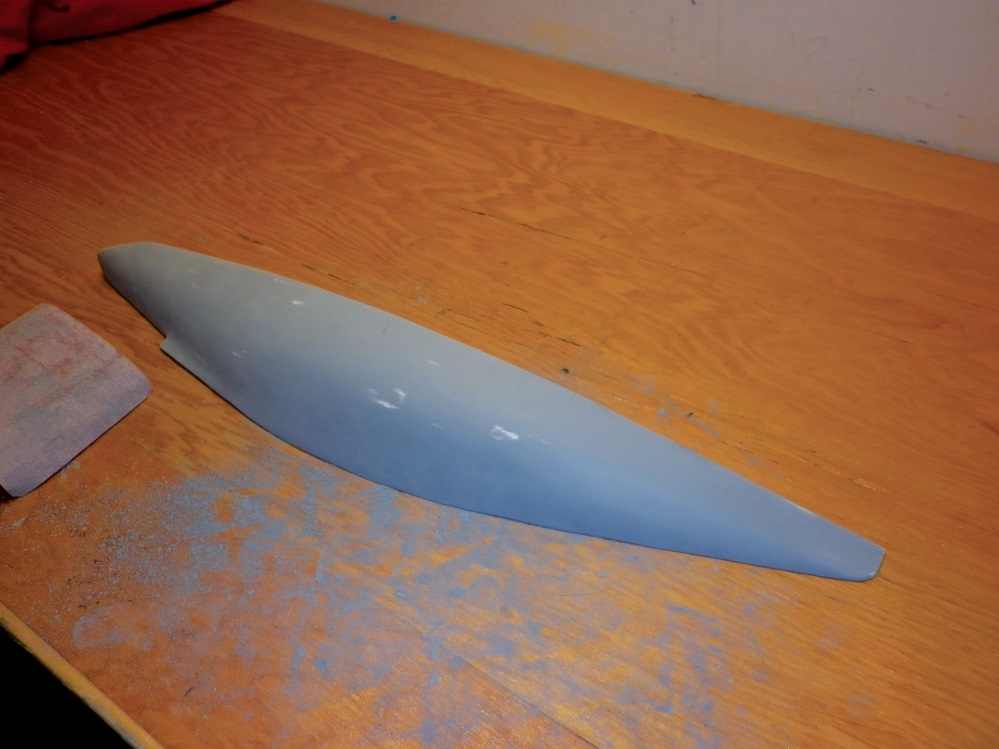
4. Major imperfections had now been removed from the hull, but the finish was far from perfect. I sprayed a couple of layers of white Tamiya primer over the hull, this would act as my guide coat. On top of that I sprayed about 10 coats of gray high-build automotive primer. This layer was then sanded back with 230-grit sand paper until I hit the white guide coat. I repeated this process twice to remove all the imperfections.
5. Next, I attached the keel and sprayed the hull with six coats of Tamiya high gloss white model paint. For the graphics, I studied photographs ofKiwi Magicand designed the artwork in Adobe Illustrator. From my local model shop I brought a packet of clear decal paper on which I printed the graphics using a desktop ink jet printer. The sheet of decals then needed to be coated with decal fix to seal in the ink. The decals were then cutout, soaked in warm water for 30 seconds and transferred to the hull. This was the most exciting part of the project.
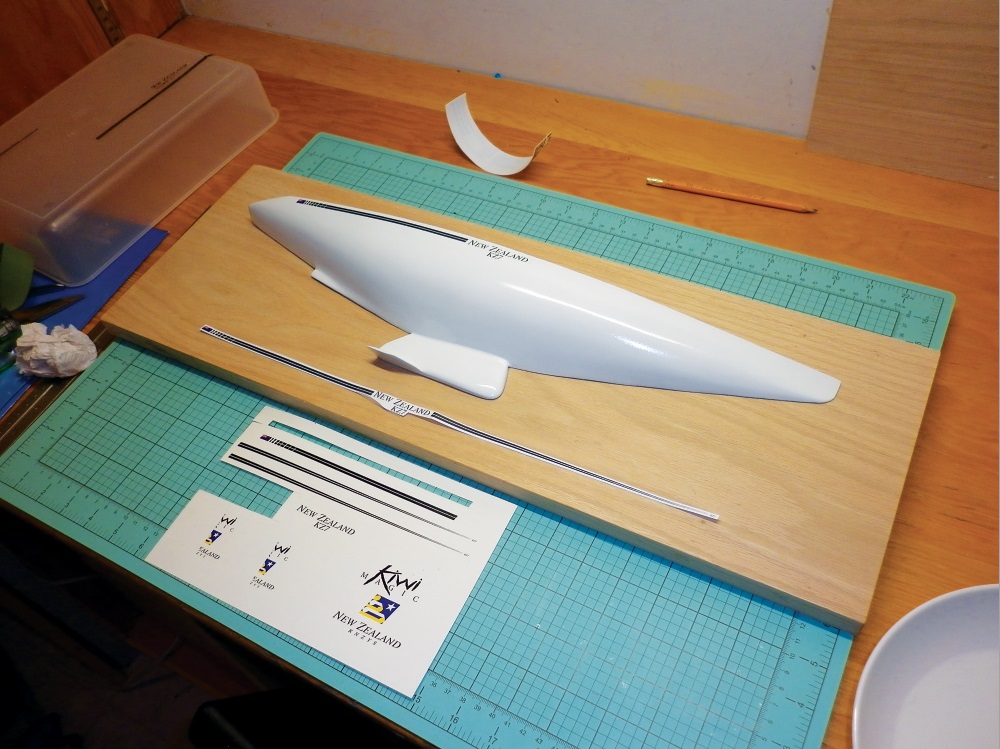
6. With the decals completely dried, I sprayed the hull and deck with 10 coats of Tamiya Clear Coat. This helps to seal the decals to the hull and gives a deep gloss finish. Finally, the clear coat was cut back using a medium and then fine cutting compound.
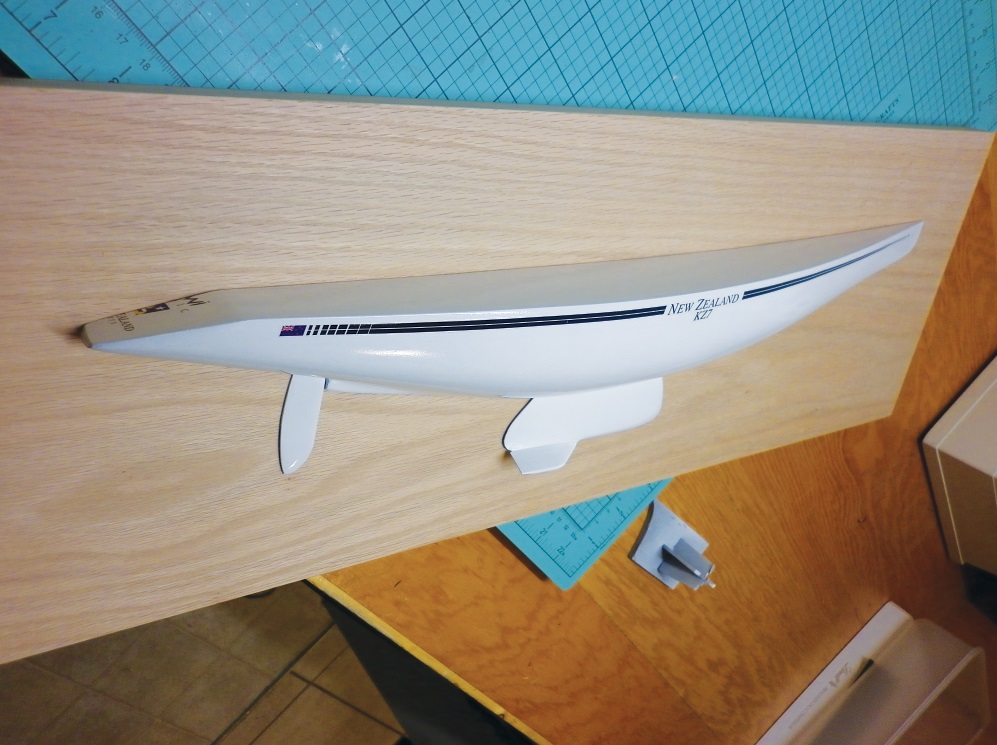
7. The last job was to mount the finished hull. I went down to my local lumberyard in search of a piece of hard wood. I selected a 24-inch x 8-inch piece of red oak and opted for a dark stain to contrast the white hull. The last thing to do was have a brass plaque made by a local trophy shop. Once this was mounted the project was complete.
I really enjoyed the build process, despite making many mistakes along the way. The knowledgeable people at my local model shop gave me lots of advice and provided me with nearly all the materials to complete the build. I think the key to a project like this is in the detail, the process can’t be rushed as the finish needs to be perfect. I’ve noticed when people look at the model, they get up really close, five or six inches away, so any imperfections stand out like a sore thumb. The model is now proudly displayed on my office wall.